

How To Install Vinyl Plank Floating Flooring
How to Install Luxury Vinyl Plank Flooring
Go a great-looking new floor in one 24-hour interval
![]() Fourth dimension
Fourth dimension
A full day
![]() Complexity
Complexity
Intermediate
![]() Cost
Cost
$101–250
Introduction
Luxury vinyl (LV) is tough and good-looking—and the easiest flooring material you'll ever install. These tips and tricks volition aid you get the job done right.
Tools Required
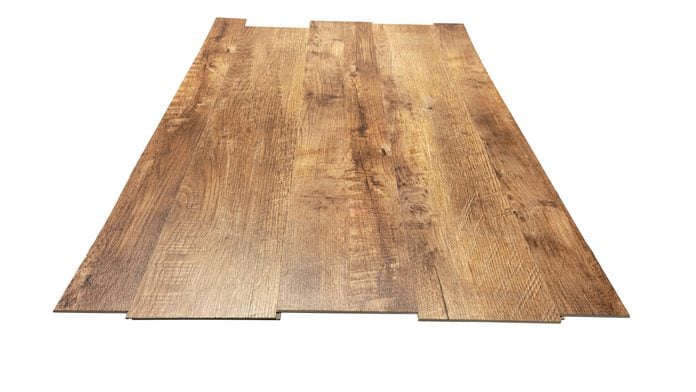
Luxury vinyl flooring (LVP) is similar to sheet vinyl, merely information technology's thicker, more durable and easier to install. It comes in tiles and planks, just this article covers planks but, and uses a product chosen Adura LockSolid. It's a floating flooring which means it isn't fastened to the subfloor—it just lies there.
Luxury vinyl is the fastest-growing category in the floor industry. LVP starts at nearly a couple of dollars per foursquare foot, similar in price to medium-grade laminate. Information technology's available at floor stores and home centers.
Projection step-by-step (ix)
Step 1
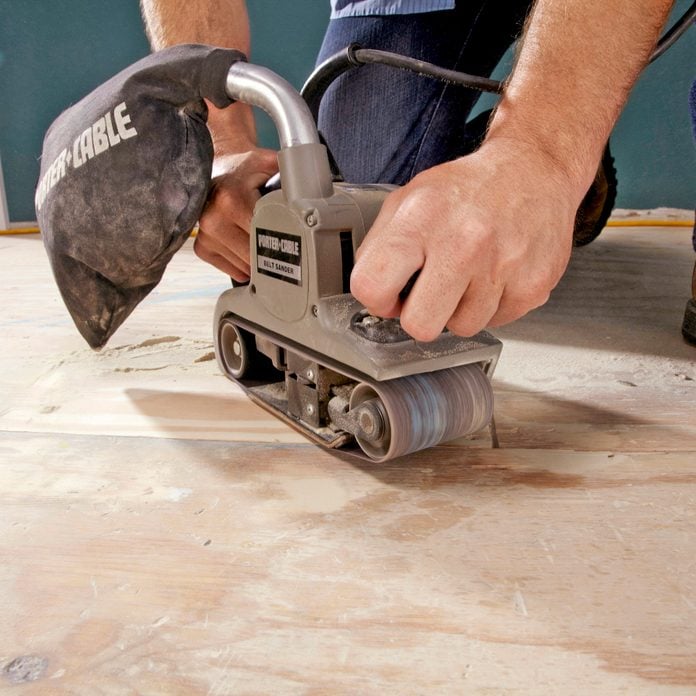
Sand Down the High Spots
- Notice the loftier and low spots on wood subfloors with a straightedge.
- Annotation: The flooring height should not ascension or drop more than 1/8 inch over the bridge of 4 anxiety.
- Sand down the high spots with a belt sander equipped with a fibroid-grit belt.
- Note: This is a dusty task, then turn off your furnace to avoid spreading dust all over the house, and wear a dust mask.
- Pro tip: Utilise the coarsest sanding belt yous can notice, such every bit 40- or 60-grit.
Footstep 2
Fill up in the Low Spots
- Make full the low spots with floor patch, and feather information technology out with a trowel.
- Pro tip: Avoid cocky-leveling floor patch. The floor doesn't accept to be level; it merely has to exist smooth.

Begin and End with Half a Plank or More
If you lay the planks parallel to the longest wall as you're installing vinyl plank flooring, you'll stop upwards making fewer cuts. But don't start that beginning row with full planks without figuring out how broad your last row is going to exist. Neither the first nor the last row should exist ripped down much smaller than half a plank.
Measure out the width of the room, and divide it past the width of the exposed portion of the plank before you lot outset installing vinyl plank flooring. For example, if your room measures 123 in., and your floor is 5.75 in. wide, y'all'd divide 123 past v.75, which is 21.39. That is, it would take 21.39 planks to complete the floor. Because this .39 represents less than half the width of a plank, you would want to cutting down the outset plank past an inch or so to increase the size of the last plank.
![]()
Step 3
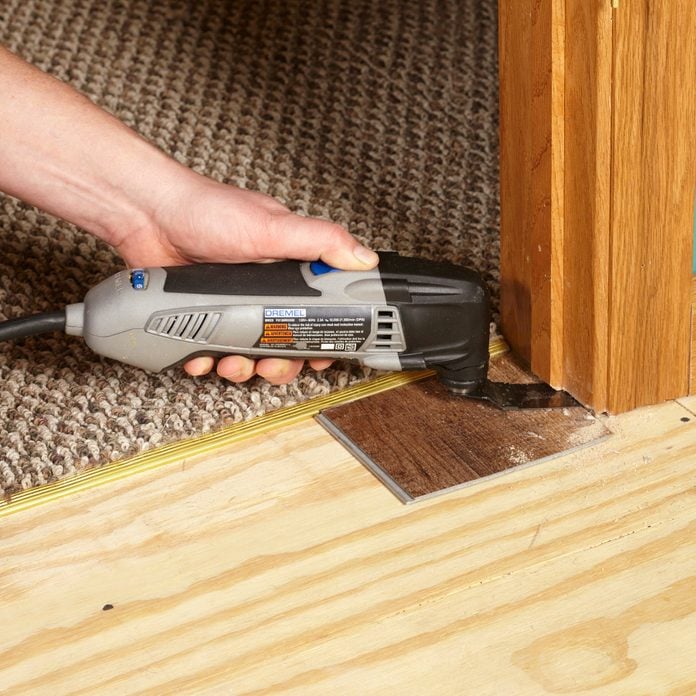
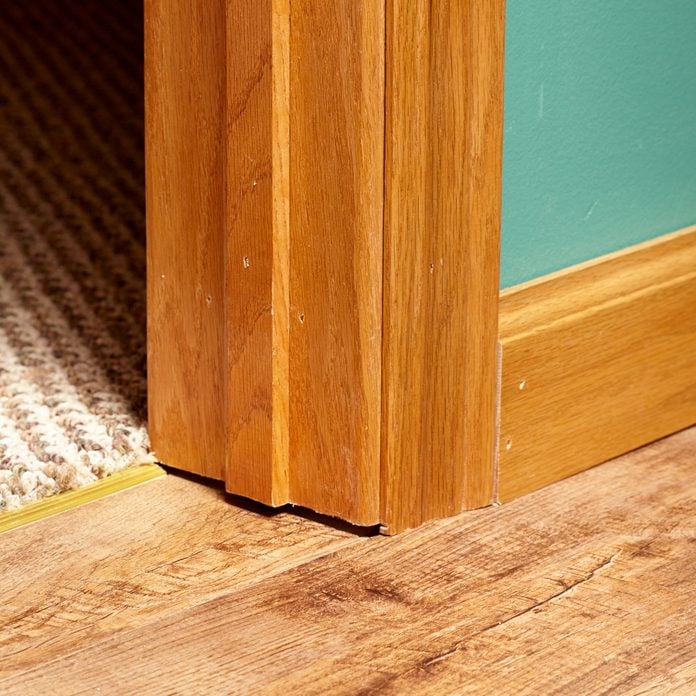
Undercut Doorjambs
- Trim jambs and casing so you lot can slide the flooring underneath.
- Pro tip: An aquiver multi-tool works great. Use a small flake of flooring every bit a guide.
Step 4
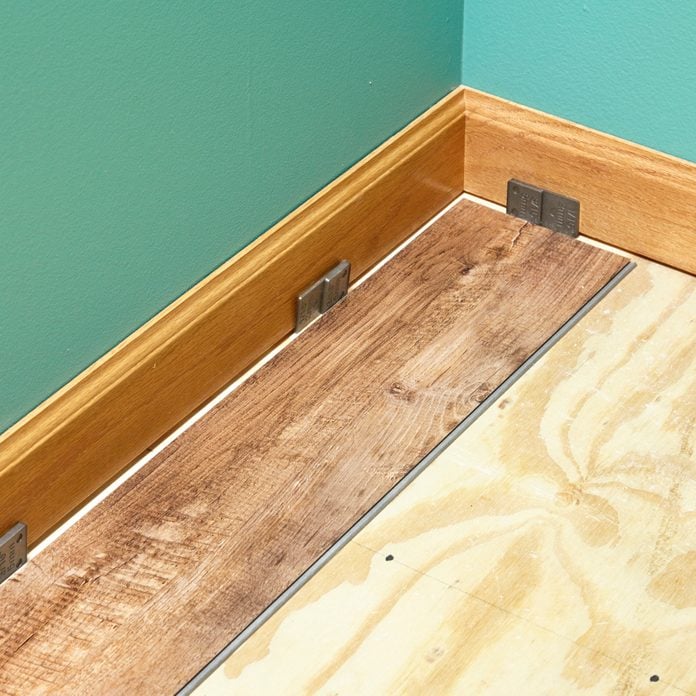
Exit an Expansion Gap Along the Walls
- Insert shims to create virtually a 1/iv-inch to iii/8-inch gap betwixt the flooring and the walls.
- Note: These gaps permit the floor to expand freely with temperature changes.
Step 5
Snap the Planks Together
- Snap the planks in the commencement row together end to end.
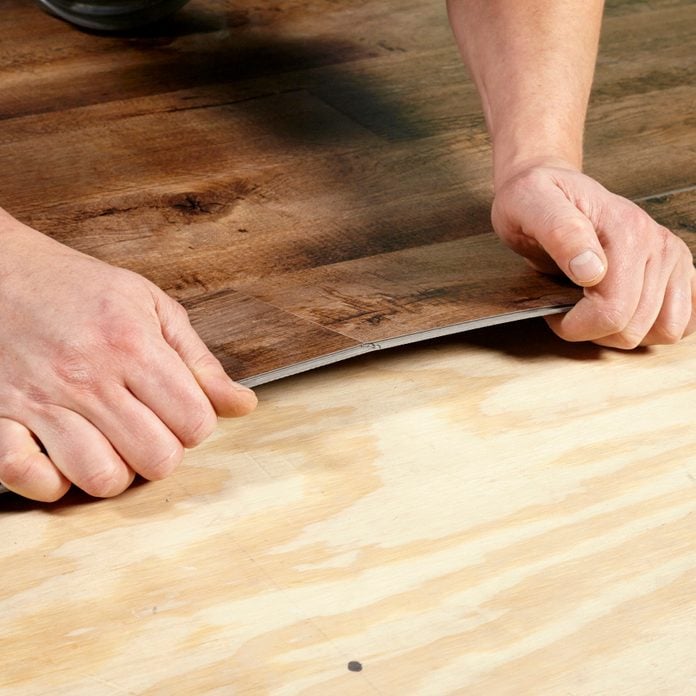
- Slide the tongue of the first plank on the second row into the groove of the first row at a low angle and lay it on the floor.
- Install the 2nd and subsequent planks in each row by locking the ends together, and then y'all work your manner down the plank, pushing the tongue into the groove as you go.
- Pro tip: It helps to twist and bend each plank into place.
Watch Your Floor Height
New flooring raises or lowers the final elevation of the floor, which can create unexpected problems. Here are some things to keep in mind:
Jambs
If you're pulling out old flooring that is thicker than your new stuff, you lot'll end up with gaps under the doorjambs. To forestall that, you could cover the subfloor with a layer of 1/four-inch underlayment to heighten the height of the unabridged flooring.
Dishwasher
In well-nigh cases, there'southward enough space above the dishwasher so that yous can heighten the floor level a little and even so reinstall the dishwasher. Only bank check the gap between the top of the dishwasher and the countertop starting time but to be sure.
Stairs
Be careful when changing flooring that butts upward to a flight of stairs. Building codes allow no more than a iii/viii-inch departure between the heights of the lowest and tallest stair risers. Irresolute the floor height at the top or lesser of stairs volition alter riser heights and could create a trip hazard.
Existing canvass vinyl and carpet
If your kitchen floor is sheet vinyl and the dining room is rug, don't forget that the canvas vinyl volition have a 1/four-inch underlayment beneath it, but the carpet won't. If you want to install LV flooring in both, you'll have to remove the underlayment in the kitchen or add some to the dining room.
Step 6
Stagger the Seams
- Stagger the seams at least half dozen inches, and don't get-go or end any row with a plank less than vi inches wide.
- Pro tip: Open several boxes at one time and mix them up to ensure a varied pattern.
Step seven
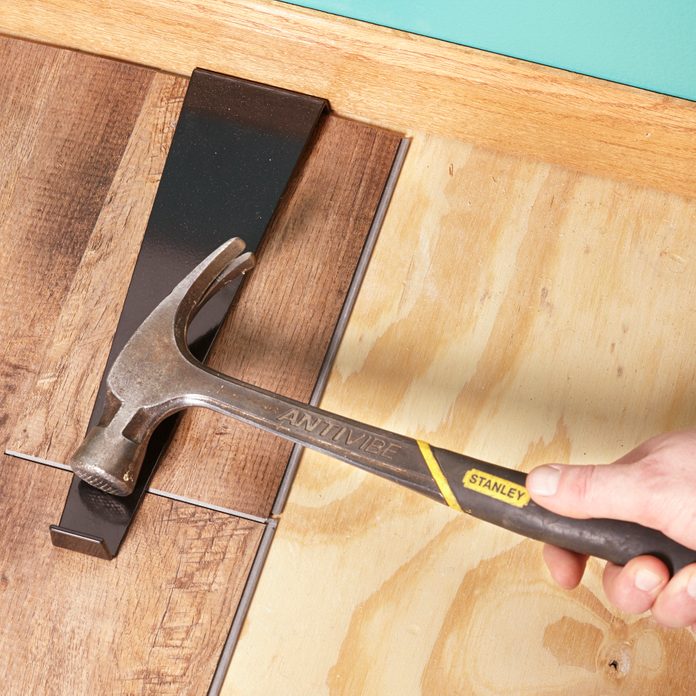
Tap in the Finish Planks
- Claw the pull bar onto the terminate of the piece, and tap stubborn seams closed.
Step 8
Install Bridge Molding
- Comprehend the expansion gap betwixt the flooring and the base trim.
- Pro tip: Don't smash into the flooring—that volition prevent the flooring from expanding freely.
Around the Doorjambs: Planks Parallel to Openings
Land the seam in the door opening
It's easier to work away from door openings than into them, merely sometimes that's not an choice. When working parallel to a door, make sure the seam on the row that intersects the jamb lands within the door opening. Mark and cut the starting time plank, then tap it into identify using a scrap of flooring and a tapping block.
Curve the second plank into place
Mark and cut the second plank to fit, and and so slide it nether the jamb. Bend information technology up in the centre then y'all can lock it into identify. This is some other situation where the flexibility of this product comes in handy. The larger this second plank is, the easier it is to work with.
Around the Doorjambs: Planks Perpendicular to Openings
Tap the get-go plank nether the jamb
Sometimes you'll accept to cut around jambs while laying the planks perpendicular to a door opening. This is easy if the door opening falls on the same side as you started your rows. Simply mark and cut the offset plank to size and tap it under the jamb with a tapping block.
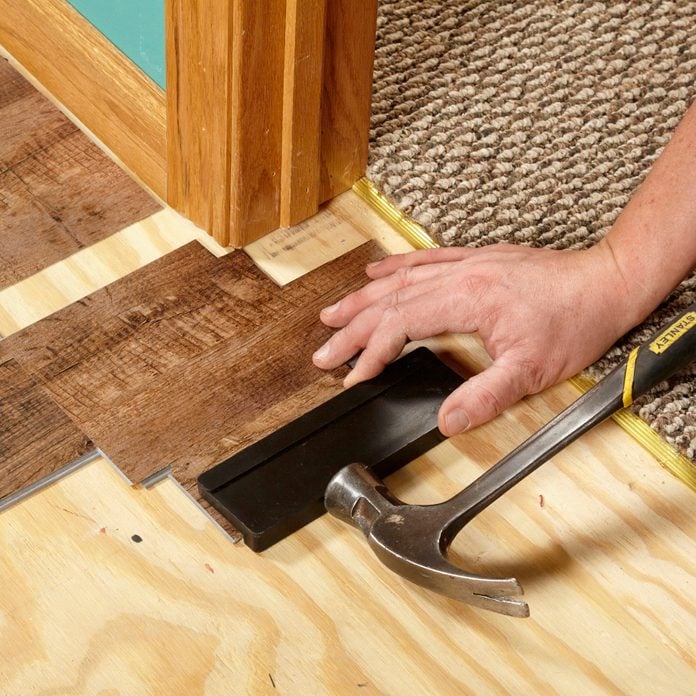
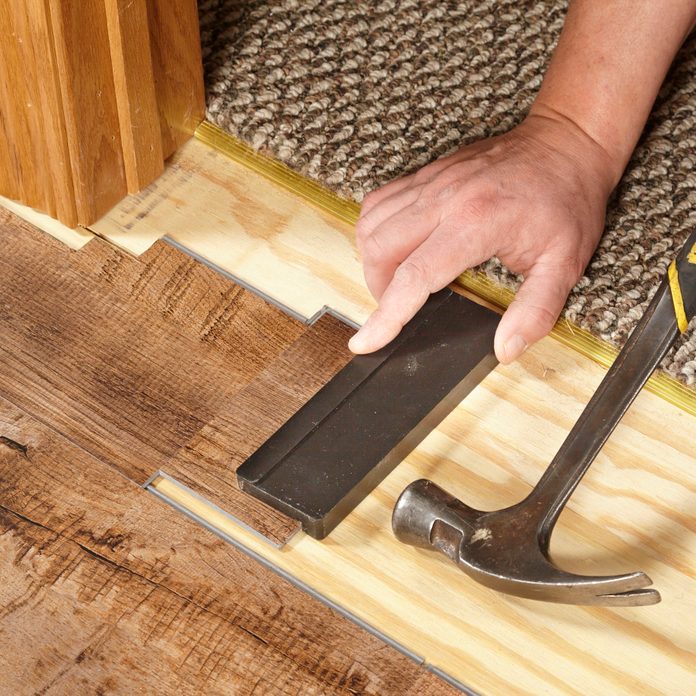
Tap the finish plank in sideways
It's trickier to work around a jamb when the door opening is located at the end of the rows. 1 solution is to marker and cut the end plank to size, and tap it in along the finish groove of the previous plank. You may not be able to lock it into identify without removing the bottom lip on the plank you're snapping it into. If you lot remove more than than half-dozen in. of the lip, use seam sealer to gum the planks together. Buy a bottle of seam sealer for near ten dollars from your flooring supplier.
Step nine
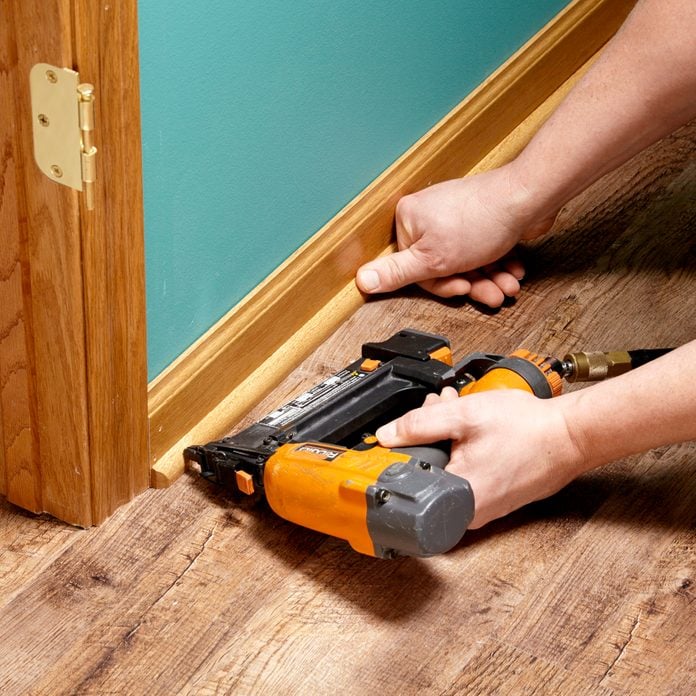
Install Shoe Molding
- In one case your floor is down, install shoe molding to comprehend the expansion gap between the flooring and the base trim.
- Shoot 1-1/4-inch finish nails through the shoe and into the base trim.
- Pro tip: Exist careful non to pin the flooring down in the process. Finish the molding to match the trim, not the flooring.
Originally Published: September 23, 2022

Source: https://www.familyhandyman.com/project/how-to-install-luxury-vinyl-flooring/
Posted by: normanlowelies.blogspot.com
0 Response to "How To Install Vinyl Plank Floating Flooring"
Post a Comment